


We ran a successful Kickstarter campaign for this product. That campaign may provide additional details about this product, so please check out the Freeplay Zero / Freeplay CM3 Kickstarter Campaign Page to learn more.
You will need to supply several accessories to successfully assemble a working Freeplay Zero using this kit.
The DIY Kit Includes
- Freeplay Zero Circuit Board (shown in red)
- 3.2″ LCD
- Built-in Brightness Controller
- 40-pin Header (to solder to your Raspberry Pi Zero or Zero W)
- 2 Standoffs (for mounting your Raspberry Pi)
- Micro USB to USB Adapter (for connecting USB to your Raspberry Pi)
- Freeplay Zero Keychain/Charm
- X/Y Button Drill Guide (if you are choosing a long clicky X/Y build)
- 2 Gray X/Y Button Caps (if you are choosing a long clicky X/Y build)
Necessary Additions
- Raspberry Pi Zero or Zero W or Zero WH (WH requires no soldering)
- Micro SD Card
- GBA-Style Shell
- Full set of Rubber Button Pads (some shells include the pads or we carry them here)
- Battery (we carry this perfect fit 2000mAh battery)
- Extra Set Of A/B Button Caps, if you are doing a soft-rubber X/Y build
- Extra A/B Rubber Button Pad, if using silicone pads for X/Y buttons (we carry rubber button pad sets)
Optional Additions
- HDMI Adapter (for playing on the big screen or testing your build before you use the built-in LCD)
- Heatsink (for those of you that are concerned about heat or plan to overclock your Pi Zero)
- Tri-Wing Screwdriver (the GBA-style shells often use tri-wing screws)
- Colored X/Y Button Caps (RetroModding.com external link)
Please see https://www.retromodding.com/collections/freeplaytechs-freeplay-zero-cm3/products/build-to-order-freeplay-zero-cm3 for any accessories that you may need that we don’t offer. On that page, you can also request to have Retro Modding build your Freeplay Zero DIY Kit for you.
Freeplay Zero DIY Kit X/Y Button Options

You can choose to not install X/Y buttons. That will make the shell modification process easier. If you choose to install X/Y buttons, you have 3 main options: silicone-rubber pad, rubber-nipple buttons, or long tactile sub-PCB. Check out this Freeplay CM3 Build Video Detailing The New X/Y Button Options, if you want to see how the build will work and look in regard to the “soft” X/Y button options.
- The “long tactile sub-PCB” method is the most tried and true method, because it has been implemented on MANY Freeplay Zero/CM3 builds up until this point. You must make 2 holes in your shell (one above A and one above B) and you may choose to install button caps in these holes or just leave the small tactile button shaft protruding through the shell.
- The “silicone-rubber pad” method uses a second set of the normal A/B button caps and a second A/B silicone rubber pad from your GBA-style shell to create another 2 buttons. We now carry sets of the silicone-rubber pads here. You must create new holes in the shell and cut up the rubber pads. Note that you will need extra A/B button caps to implement this option. You will also need to move the speaker away from the bottom button to implement this option.
- The “rubber-nipple buttons” method uses a second set of the normal A/B button caps from your GBA-style shell and a set of 4 rubber-nipple buttons to create another 2 buttons. You must create new holes in the shell, modify the 2 sets of A/B button caps, and modify the existing A/B button holes in the shell. Note that you will need extra A/B button caps to implement this option. You will also need to move the speaker away from the bottom button to implement this option.
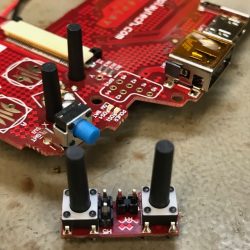
This option will NOT come with 4 square-base rubber-nipple buttons (as shown in the photo below). If you want to build using the rubber pads instead, you will need to supply a second silicon-rubber A/B button pad (as shown in the photo below). You can choose which you would like to use for your build. The rubber-nipple buttons will need to be soldered on, if you choose to use them. If you choose to use the silicon-rubber pad, the build can be solderless.


This option will be just like the pre-2019 Freeplay CM3 models. The long clicky X/Y buttons will be on a sub-PCB that sits under the main PCB. If you choose this option, the buttons will come pre-soldered to the board. Your kit will come with an X/Y button drill guide to assist you with your build and 2 gray X/Y button caps.


John Rusch (verified owner) –
The GBA was the system of my youth, and I had been trying to figure out how to fit a Raspberry Pi in a GBA shell for months. Lo and behold, Freeplay Tech introduced this bad boy, and made my dreams come true! It was simple to assemble (although I recommend you have a rotary tool to carve out a case), and the only soldering required was the gpio pins. Now I’m jamming with all my favorite old games, and it feels just like my childhood! Thanks, Freeplay Tech! It probably won’t be long before I’ll want to buy another!
Chris –
Pretty awesome kit! Takes a while to assemble and some skills are required to get it done, but once you hold the finished product in your hands and re-play your childhood memories you will be amazed.
Big thanks to Ed of Freeplaytech for shipping it over to Europe just in time for Christmas 🙂
Chris –
This kit is incredible. I never owned a GBA but it feels great in the hands. Ed did an incredible job making this and I’d recommend it to anyone that likes retro gaming. The build was not difficult and took me about an hour (I just went step by step with the YouTube video)
Jordan D. –
Fantastic kit! I had been wanting to put together a GBA Retropie build for a while now and it would not have been possible without Freeplaytech and the Freeplay Zero. Thank you to Ed and everyone else at Freeplaytech! You all rock!
Joe –
This is a great kit that can be put together by anyone, including a beginner hobbyist like me. I have had the Zero up and running for about a month, and I the look and feel is very true to an original GBA. The Retropie image specific for this build has been stable with no issues.
Great customer service! Every question I had was answered almost immediately, and I could tell that these guys want to make sure buyers have a good experience with the product.
chadponce (verified owner) –
Just wonderful. I love it! I have to try the FREEPLAY CM3 as well soon!!
Thank you for this incredible product!!
ballen (verified owner) –
Fantastic project. It was fun building it!
I ended up buying three GBA cases before I finished, but that was due to me being picky. I found the best tools (for me) were side snips and a good Xacto set.
Battery life was a concern prior to starting this project. With the two 1000mah batteries it isn’t in use. I’m not sure what my exact mileage is, but it’s several hours (extensively “tested” with Super Mario Kart and Mario Kart Super Circuit).
I’ve been happy with performance for the emulators I use… GBA (took a bit of work), GB, GB Color, NES, SNES, NeoGeo (!), Master System and Genesis/MegaDrive.
I am still trying to get MAME working, most games either don’t run or run slowly. I’m using the same MAME library as my Pi3 Retropie, but the Pi Zero doesn’t seem to have enough juice to properly run the lr-mame emulators. Not the fault of Freeplay, probably just needs some more loving and emulator work on my part.
I didn’t like the slider as the hotkey. It was an easy fix to put it back to start+select.
Down the line, I intend to play with the hardware. I’d like to try to add in a Noir camera and a sensor or two. Love the fact the buttons are GPIO based – That coupled with the portable format provides some interesting possibilities outside of emulation. This thought (and full GPIO plus wireless) was why I bought the Pi Zero over the CM3 version.
Thank you Ed/Freeplay for this awesome project. I’m considering the CM3 version down the road!
Stephanie Roberts (verified owner) –
I just wanted to say thank you for this kit. I had assembled some of the parts to put a pi3 into an old Atari Lynx, but I knew it was going to be a very challenging project, then I saw your kit. I immediately bought the kit, a pi zero, and a GBA case off ebay. It went together in a day, no hitches at all! I thought the battery I had might fit, but it was a tiny bit too big, so I got a pair of batteries from you, and you shipped everything so quick for each order, I’m quite impressed! Now all assembled, this is possibly one of the easiest things I’ve built, and I’m having a blast playing with all the Atari 2600 games I grew up with, now in pocket size. Thank you so much !
Nick Schrotenboer (verified owner) –
This Kit is excellent. Well designed and performs perfectly. I highly recommend it if you are trying to put together your own retro system in a handheld.
Even better than the product is the customer support. I made some silly mistakes and ended up needing help twice. Both times support immediately responded and resolved the problem even though it was my fault. They really went above and beyond to make sure it was a good experience.
Kent Brailsford (verified owner) –
This Kit is awesome! It really brings back memories of the original GBA with better features like back light and better audio. Easy to put together and it is great having other emulators being portable as well. I am very impressed with the board.
SidEShoW –
Absolutely amazing kit! A perfect DIY project! What really blows me away is the customer support! Ed is extremely quick with responses and very knowledgeable. A special thanks to him for helping me get my modifications to work.
Steven –
Awesome KIT! Great detailed instructions! Works great!
Thanks Ed !
Daniel (verified owner) –
I got this kit so I could learn to solder on a circuit board before attempting to build a megasquirt ecu. I could not be happier with this kit. It was very fun to build and even more fun to play. Runs snes, gbc and nes games flawlessly. Gba games run very well but there is some audio lag when you state save. This is down to the processing power of the pi zero, not the free play kit. Audio has some static. Cleared most of it up by filing down the case to reduce interference with the volume control knob. I’m only giving this kit 5 stars because I can’t give it 10! Loads of fun from start to finish!
vulcro.yt (verified owner) –
for this price, the feel is really bad. Had to wait more than a week for a complete garbage that is totaly unprecise and is totally a gadget.
Buy something else. I wasted money on an Screen that shows a menu. (I know the way to make it, it’s just not as good as everyone let’s you know. Kinda weird BTW)
Daniel K. (verified owner) –
A really awesome, and easy DIY project. Only needed a couple of “adjustments” to my aftermarket Super Famicom GBA case, and everything fit like some factory kit. I’m using two 1000 mah lipo batteries, they fit the battery case great. The games play reasonably good on my Pi zero w, although not as smoothly as on my Pi3B+. Bought a glass screen cover, now its pretty scratch resistant. I play with it everywhere, in car, at home (during company education, my colleagues loved it). I tried many ways to make my Game boy retro emulator game (with button board, with aio boards… no luck).
If you like playing retro games on the go, don’t go further, buy this kit, or the raspberry pi 3 version, you won’t regret it.
Jacob R (verified owner) –
Love it! Was really easy to do with a razor and a dremel tool, and that’s coming from someone with no experience in projects like this.
David (verified owner) –
Guys, this thing is awesome. And even better is the build support provided by Ed. After multiple emails back and for of me asking for help, we were able to fix a board my rookie self damaged. Now that it is assembled this thing is great. it plays well and responds well. Highly recommended. Best customer service.